Quality scan of the original. All the detail necessary to troubleshoot, repair and adjust the unit. I'm sure I will be downloading more manuals in the future as the need arises.
Well.. I'd searched for this manual and although I found many copies online I was pleased to find your website with a well balanced pricing system and easy to search and follow links. That together with the very quick response time was just what I was looking for.. being a very impatient tech.. ;-) I had the service manual in front of me within a short time.
Bookmarked.. and you can bet I will always come here first for my service & user manuals..
best regards
Ed(Tony) Foley
G7WHK
I will definitely be back for more information when I need it.
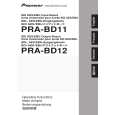
Text excerpt from page 61 (click to view)
5
6
7
8
INSTALLATION
A
1. Remove the PRV-LX1 top panel. � Remove the seven screws in the top panel and the top panel (these screws will be used to reinstall the top panel in Step 14).
Top panel
B
2. Remove the rear panel blind plate. � To prevent the blind plate from dropping, hold it in place while removing the two black installation screws (these screws will be used to reinstall the terminal cover in Step 12). Blind plate Remove the blind plate on the left (as seen from the rear) to install the PRA-BD11 input board. Note: Make sure that the removed screws are not mixed up with the screws supplied with this unit.
C
Remove the blind plate on the right (as seen from the rear) to install the PRA-BD12 output board.
3. Remove the rear bridge. � Remove the four installation screws and the rear bridge (these screws will be used to reinstall the bridge in Step 9). Rear bridge Note: Make sure that the removed screws are not mixed up with the screws supplied with this unit.
D