|
|
|
Who's Online
There currently are 6043 guests online. |
|
Categories
|
|
Information
|
|
Featured Product
|
|
|
 |
|
|
There are currently no product reviews.
 ;
Good manual contains all it takes to update, repair,these types of mixers.Thanks.
;
Great service. Fast response. High quality scan. Good price.
Thank you very much!!!
Oleg S.
;
Well-scanned, complete manual. Contains the information needed for repair and maintenance.
;
It's great to be able to obtain a precious technical information for a real old equipment. The one I got helps me a lot in the area of wiring diagram to repair my antique. PDF gave me clear enough information to find out thr details. Thanks for giving me the oppotunity to be able to access to almost vanished informations.
;
Another excellent aquisition. Fine detailed manual. Thanks
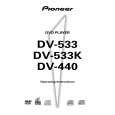
DV-533, DV-3310, DV-533K, DV-5310KD
Disassembly of the Traverse Mechanism Assy and the Pickup Assy 1 2 3 4 5 6
Remove the Bonnet and Tray Panel. Remove the Front Panel. Remove the Bridge (Screw �1). Pull out the Tray and remove it while unhooking a Hook. Turn the Short SW to Short side. Remove three connectors.
7 8
Remove the Loading Mechanism Assy (Screws �4). Remove a screw.
Cautions:
Screw is locked with Silicone Adhesive. Please lock it with Silicone Adhesive when installs it. Remove the FFC Holder with the state which Flexible Cable was atatched. 8 Silicone Adhesive GEM1037 Traverse Mechanism Assy
9
4
-1
Hook Bridge
9 3
-2 -1
3
6 6
6
FFC Holder
4
-2 DVDM Assy Bottom View
RearView
Pickup Assy
Short
Open
5
Short SW
When Removing The Traverse Mechanism Assy
Caution in the tray insertion
In the Tray insertion, insert it after matching a triangle mark of the Loading Base and a position of pin of the Drive Cam. Triangle mark Loading Base
10 11 12
Remove the Pickup Flexible Cable Unhook ( �4) Remove the Traverse Mechanism Assy
Traverse Mechanism Assy
DVDM Assy Side
11 � 2
12
10
11 � 2
Traverse Mechanism Assy
Pin
Drive Cam
Exchange
73
|
|
|
> |
|